I was recently reminded of the unique challenges that come from measuring custom dyed whipping yarn. This is a topic we’ve already tackled via a tips and tricks blog post back in August 2018, so I wanted to return to that post and share a refresher. If you’d like to revist a tip on measuring yarn for whipping, read on below!
For most of my rug hooking career, when it came to whipping rugs, I’d buy a skein of yarn and run with it. Recently, I’ve taken a different approach by hand dyeing my whipping yarn. With the new approach is a new conundrum: how much yarn do I need to dye? I want to ensure I have enough yarn for the project, without dyeing so much that I need to invent another reason to use it.
After a little bit of experimenting, I’ve come up with a method to help determine just that; just folow these steps to estimate how much yarn you’ll need to dye to finish your project:
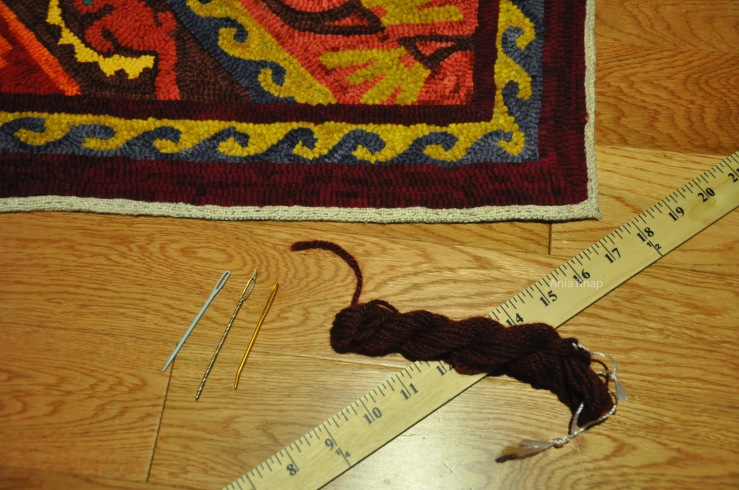
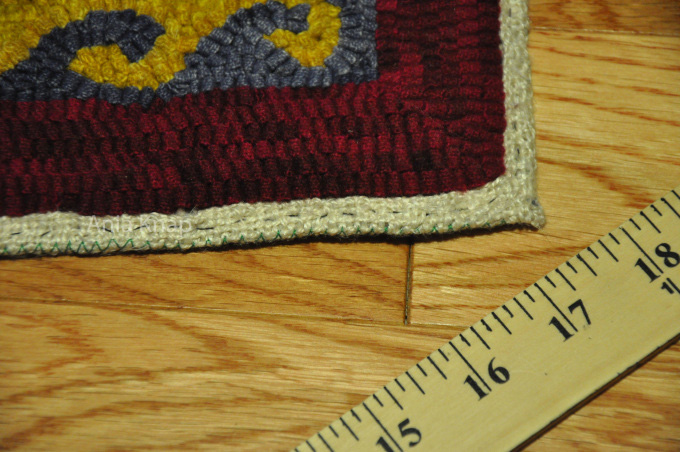
Step 1: After you’ve finished hooking your pattern, pressed it, and trimmed the backing, turn it over so that you have a half inch edge. I use a simple running stitch to keep the folded edge in place.
NOTE: The wider or narrower your edge is, the more or less yarn you’ll need to whip your rug.
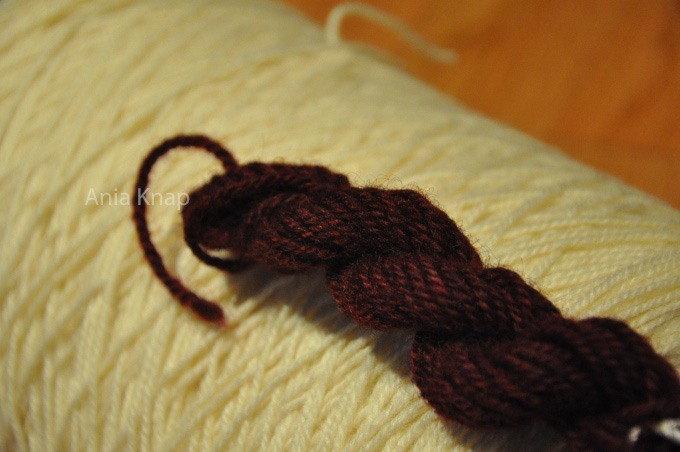
Step 2: When you hand dye your whipping yarn, you often work from a very large skein of yarn. To help determine which color I want to dye my yarn, I make a mini skein from my larger skein of whipping yarn, and use that to play around in the dye pot. I use this hand dyed mini skein to help determine how much yarn I’ll need to finish my entire project.
NOTE: When you’re dyeing your own yarn, you will need to account for shrinkage in your measurements. In my experience, I’ve noted a 2% shrinkage when dyeing a three ply 100% worsted wool yarn.
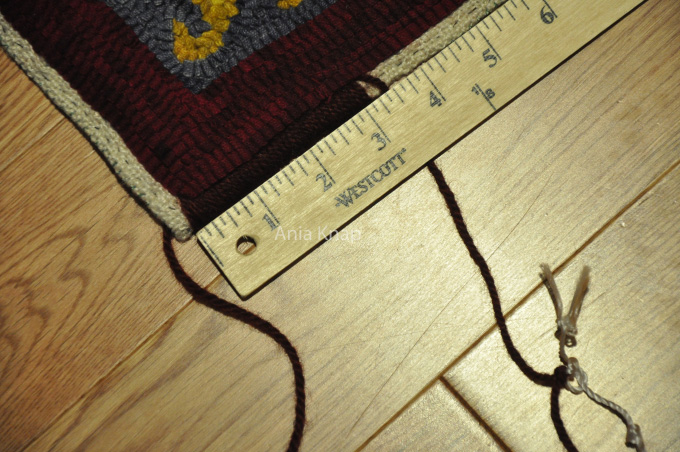
Step 3: Measure out four feet of yarn from your mini skein. I suggest marking the measurement with a knot, instead of cutting the yarn, to help avoid wasting your materials. Whip stitch along your rug as you normally would, leaving a six inch tail at the start. Continue your whip stitch until you have a six inch tail left. You should have two six inch tails, one at the start and one at the end of your whipping.
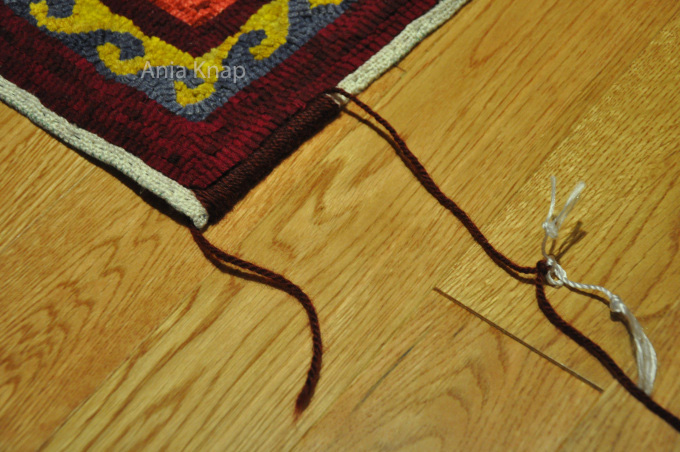
Step 4: Measure how much whipping resulted from your four feet of yarn. For this project, one yard of yarn (i.e. four feet minus two six inch tails) resulted in three inches of whipping. That made the math easy!
I could count on approximately one foot of yarn resulting in one inch of whipping. If the edge on your rug is narrower or wider than half an inch, ‘your mileage may vary’ on how far you get with four feet of yarn.
Step 5: Measure the outer edge of your rug, so that you know the exact length that you will need to whip. My rug was 162 inches around.
Step 6: Do the math! For my project, one foot of yarn resulted in one inch of whipping, and so I’ll need at least 162 feet of yarn.
We also need to take into account the shrinkage from dyeing the yarn, that corners require more yarn, and that I also like to have a little bit of extra yarn put away just in case I need to complete repairs. So, I decided to dye an additional 10% of my yarn, resulting in a final total of 180 feet of yarn for this project.
Step 5: Measure out your yarn, dye it, and whip away!
If you have any questions on this process, feel free to comment below!


