October’s Rug of the Month is a seasonal project. Ania designed this pattern at the end of August – it’s called “3D Pumpkin.” The pattern actually includes two different pumpkins, one bigger than the other. The bigger pumpkin was hooked with half inch torn strips, and the smaller pumpkin was hooked with #8 cut strips.
Read on below to learn about what inspired this project, and to see images of the completed pumpkins:

Why did you decide to create this pattern?
People had created 3D pumpkins before, and so I knew this wasn’t anything new, but I wanted to try it out. I wanted to create a Fall/Halloween decoration for the upcoming season. I also thought hooked pumpkins would go well with a Fall themed table topper I had created a couple of years ago.

What inspired you to create a 3D project?
I’d never hooked a 3D project before. I liked the idea of hooking a 3D pumpkin in which I challenged myself to do some fine shading.
Although you designed both pumpkins at the same time, and hooked them one right after the other, you approached them very differently. How did you decide to color plan each pumpkin? Why did you decide to use different sized strips for each pumpkin?
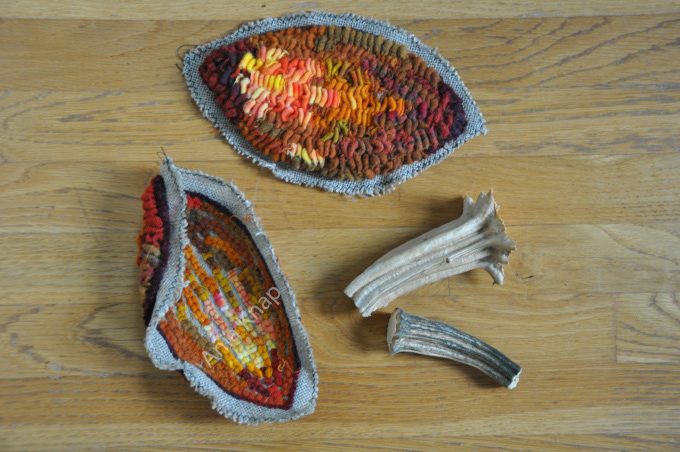
The smaller pumpkin I hooked using scraps from my wool stash. I cut up a bunch of orange wool into #8 cut strips, put all the strips into a bag, and then plucked them out of the bag at random, and hooked away.
The bigger pumpkin I hooked using the same torn strips that I had prepared for a Poppy rug class that I’d taught this past summer. One of my students from this class had wanted to hook a pumpkin rug with torn strips, and I thought a 3D pumpkin might be a good visual aid for her. A 3D pumpkin would allow her to see how you can highlight a pumpkin with a strip of that size. She’s using my pumpkin as a reference for her rug!
What was the biggest challenge about this project?
Not knowing how it was going to turn out! I had no clue what the segments would look like when they were put together. It was a total shot in the dark. The torn strip pumpkin was harder to sew together because of the bulkiness of the strips. Once each segment was hooked, the outer edges would curl inwards, which also made it more difficult to sew each segment together.

Is there anything else that is special about this project?
Yes! The leaf on the bigger pumpkin is reversible. I was inspired to create a reversible pumpkin leaf by a project I’d admired from a fellow teacher: a reversible black and white sheep mat hooked by Ingrid Hieronimus (you can take a look at her website here, and Ingrid provided images of her reversible sheep mat which you can see below).
I also wanted to include tendrils on my pumpkins. I made them using left over strips of wool in green and plaid. I soaked the strips in a mixture of water and white glue. I then wrapped them around a pencil to dry.
I sewed these tendrils and the leaf into the top of my pumpkin when I finished them. I also used real pumpkin stems to finish off these projects, which was fun.


As always, if you have any questions or comments for Ania, you can leave them in the comments below!
